
Chapter 7. Creating Falcon Entity Definitions
Before you can use Falcon to process, manage, or replicate data or configure for disaster recovery, you must create directories in HDFS for Falcon to use, then create the necessary Falcon entity definitions. You can create the entity definitions from the web UI or from the CLI.
There are three types of entities.
- Cluster
Defines the cluster, including its interfaces, where data and processes are stored.
Cluster entities are required for all jobs.
- Feed
Defines the datasets to be cleaned and processed.
Feed entities are required for replication and retention.
- Process
Defines how the process (such as a Pig or Hive job) works with the dataset on top of a cluster. A process consumes feeds, invokes processing logic (including late data handling), and produces further feeds. It also defines the configuration of the Oozie workflow and defines when and how often the workflow should run.
Process entities are required for all jobs. However, you can run a process without a feed entity if data replication or retention are not required.
Replication Between HDP Versions
Before you define the resources to be used in replication jobs, ensure that the versions of HDP you are running are compatible for replication.
Table 7.1. Supported HDP Versions for Replication
| HDP Release | Can Replicate To | Cannot Replicate To |
|---|---|---|
| 2.0 | 2.0, 2.1 | 2.2 or later releases |
| 2.1 | 2.1 | 2.2 or later releases |
| 2.2 or later | 2.2 and any subsequent release | 2.1 or earlier releases |
Running Falcon in a Secure Environment
Before accessing Falcon in a secure environment, your cluster must be properly configured following the instructions in the HDP Security guide.
After completing an Ambari secure installation with Falcon, Kerberos is enabled. You can access the Falcon web UI from the Ambari Views menu without any additional configuration.
When creating Falcon entities, most of the required Kerberos information is automatically populated in the web UI.
If secure HDP is installed from the CLI, you need to ensure that Falcon was also configured for Kerberos.
If you need to access the standalone Falcon web UI, you might need to add the VM name and domain to your browser, following the browser instructions for Kerberos single sign-on (SSO) configuration.
Creating HDFS Directories for Falcon
You must create the following directories in HDFS prior to submitting a cluster entity to Falcon:
/stagingFalcon stores artifacts of processes and feeds, such as the feed and process definitions and job logs, in
/staging. When you schedule an entity, the workflow and library you specify in the entity are copied to the staging path./workingFalcon copies the
.jarfiles needed to run processes and feeds to the working directory./tempFalcon uses the Temp directory to do intermediate processing of entities in HDFS.
Steps
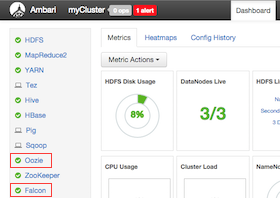
In the Ambari UI, ensure that the Falcon and Oozie services are running.
Confirm that the Falcon and Oozie services have green check marks adjacent to them on the Ambari dashboard:
Log in to the HDFS server as the falcon user.
sudo su falcon
Create the directory structure on HDFS for the staging, temporary, and working folders in which the cluster entity stores the dataset.
These folders must be owned by the falcon user.
hadoop fs -mkdir -p /apps/falcon/primary_Cluster
hadoop fs -mkdir -p /apps/falcon/primary_Cluster/staging
hadoop fs -mkdir -p /apps/falcon/primary_Cluster/working
hadoop fs -mkdir -p /apps/falcon/tmp
![[Tip]](../common/images/admon/tip.png)
Tip You can also create the directories from the Ambari UI File View. You must be logged in as user falcon.
Set permissions on the cluster staging directory to 777 (read/write/execute for owner/group/others) to allow multiple user access.
hadoop fs -chmod -R 777 <your_staging_directory_path>
Only Oozie job definitions are written to the staging directory, so setting permissions to 777 does not create any vulnerability. Keep permissions on the working directory set to 755 (rwx/r-w/r-w).
Tip You can also change permissions on directories from the Ambari UI Administration menu. You must be logged in as user falcon with administrator access.
Launch the Falcon web UI from Ambari:
On the Services tab, select Falcon in the services list.
At the top of the Falcon service page, click Quick Links, and then click Falcon Web UI.
![[Important]](../common/images/admon/important.png)
Important To access the Falcon UI on a secured cluster, use
kinitbefore accessing the Kerberos-protected web server and configure your browsers for SPNEGO access. For more information, see Configure Browser for SPNEGO.
Defining Entities Using the Falcon Web UI
The Apache Falcon web UI simplifies the process of defining and deploying entities in a data pipeline. Using the web UI ensures that the XML definition file that you use to deploy the data pipeline to the Falcon server is well-formed. You can access the Falcon web UI from Apache Ambari.
See the Ambari Automated Install Guide or Non-Ambari Cluster Installation Guide for installation instructions for the Falcon component.
See the Apache Ambari Views guide for installation instructions for the Falcon View in Ambari.
Prerequisites
Ensure that the following components have been installed on your cluster:
Hortonworks Data Platform (HDP)
Apache Falcon
Apache Oozie
Ensure that the required HDFS directories have been created with the appropriate permissions. See the section called “Creating HDFS Directories for Falcon”.
Steps
To create a data pipeline, you must define the entities you are using, by performing the following actions:
Creating a Cluster Entity Definition Using the Web UI
You must specify a cluster entity before defining other elements in your data pipeline. The cluster entity defines where the data and the processes for your data pipeline are stored. For more information, see the Apache cluster entity XSD.
Steps
At the top of the Falcon web UI page, click Create > Cluster.
On the New Cluster page, specify the values for the following properties:
Table 7.2. Cluster Entity General Properties
Property
Description
Cluster Name
Name of the cluster resource entity. Not necessarily the actual cluster name. Cannot be changed after the entity is created. The naming criteria are as follows:
Must be unique to the data center
Must start with a letter
Is case sensitive
Can contain a maximum of 40 characters
Can include numbers
Can use a dash (-) but no other special characters
Cannot contain spaces
Must match the name of the directory containing the staging, tmp, and working subdirectories.
Data Center or Colo Name and Description
The data center to which the cluster belongs. Used to identify the correct cluster for the entity.
Tags
Metadata tagging to classify the cluster.
Table 7.3. Cluster Entity Interface Properties
Property
Description
File System Read Endpoint Address
A read-only interface that specifies the endpoint and protocol to connect to a data source. Required for DistCp (distributed copy). This would be used for replication, such as importing from a data source into HDFS. Located in Ambari at
HDFS>Configs>Advanced>NameNode>NameNode
                                                host
. The URI might be hftp://<hostname>:50070 or hdfs://<hostname>:8020.File System Default Address
A write interface that specifies the endpoint and protocol to write to the datasource. Falcon uses this interface to export data from HDFS to the data source. Located in Ambari at
HDFS>Config>Advanced>Advanced core-site> fs.defaultFS.YARN Resource Manager Address
Required to write jobs to MapReduce. Located in Ambari at
Yarn>Config>Advanced>Resource Manager>ResourceManager host.Workflow Address
Required to submit workflow jobs. Located in Ambari at
Oozie>Config>Advanced>Oozie Server>Oozie Server host.Message Broker Address
Required to send alerts. Located in Ambari at
Falcon>Config>Advanced>broker.url.Metadata Catalog Registry
Optional. Use to register or deregister partitions in the Hive Metastore and to fetch events about partition availability. Located in Ambari at
Hive>Config>Advanced>General>hive.metastore.uris.In a secure environment, you must also add a property name and value for
hive.metastore.kerberos.principalfound underAdvanced hive-sitein Ambari. Example: key=hive.metastore.kerberos.principal, value=hive/_HOST@EXAMPLE.COMSpark
Optional. Select if you want to run a Spark job. You can deploy Spark on a YARN cluster or client, locally, or on a custom site. You only need to add an endpoint for the Custom option.
Important: The
yarn-clientexecution mode for the Oozie Spark action is no longer supported. Oozie and Falcon continue to supportyarn-clustermode.Table 7.4. Cluster Entity Properties & Location Properties
Property
Description
Properties
Specify a name and value for each property. In a secure environment, the Name and Value fields are automatically populated with content from the
Custom falcon-startup.propertiessection in Ambari. Example: key name=dfs.namenode.kerberos.principal, value=nn/_HOST@EXAMPLE.COMLocation
Specify the HDFS locations for the staging, temp, and working directories. The directory that contains the staging and working subdirectories must have the same name as the entity's Cluster Name. For more information, see Creating HDFS Directories for Falcon.
Table 7.5. Cluster Entity Advanced Properties
Property
Description
Access Control List
Specify the owner, group, and access permissions for the cluster. Default permissions are 755 (rwx/r-x/r-x). Click Next to view a summary of your cluster entity definition.
(Optional) Click Preview XML to review or edit the entity definition in XML.
After verifying the cluster entity definition, click Save.
The entity is automatically submitted for verification, but it is not scheduled to run.
Verify that you successfully created the cluster entity by clicking the Clusters icon at the top right of the window.
If the entity name appears in the cluster list, the entity was created.
Schedule the entity.
In the cluster list, click the checkbox next to an entity name with status of
Submitted.Click Schedule.
After a few seconds a success message displays.
| Tip |
|---|---|
You can modify an existing cluster entity from the clusters list by clicking Edit. However, the Falcon service must be in safemode before you can edit the cluster entity. |
Creating a Feed Entity Definition Using the Web UI
The feed entity defines the datasets that are cleaned and processed in your data pipeline. For more information, see the Apache feed entity XSD.
The Feed entities have policies attached to them that need to be explicitly scheduled by Falcon. Falcon takes the retention, replication, feed frequency, and delays and creates Oozie Coordinator jobs to automate all of these actions for you. To process data, you must define two feed entities: One for data input and one for data output.
Steps
At the top of the Falcon web UI page, click Create > Feed.
On the New Feed page, specify the following values:
Table 7.6. General Feed Properties
Property Description
Feed Name and Description
The dataset feed name must be unique on the cluster. This name is referenced by processes as input or output feed. Cannot be changed after the entity is created.
Tags
Metadata tagging to classify the dataset. For example, you can set the key to "externalTarget" and the corresponding value to "Marketing", tagging this feed for marketing.
Feed Groups
A group is a logical association of feeds. Feeds can belong to multiple groups. A group is said to be available if all the feeds belonging to a group are available. The frequency value must be the same for all feeds in a group.
Type Options are Hive, HDFS, RDBMS Import, and RDBMS Export. You can also choose whether to enable replication for the feed type. Table 7.7. Hive Source and Target Feed Properties
Property Description Cluster The target cluster entity. Table URI Metadata catalog specification for the Hive table, in the metadata format catalog:. Example: catalog:logs-db:clicks#ds=${YEAR}-${MONTH}-${DAY}$database_name:$table#(partition-key=partition-value);+Start and End Times Date is entered in mm/dd/yyyy format. Time is set to a 12-hour scale. After the feed job starts, it continues at the given Frequency setting until reaching the end time. Retention Period to retain instances and number of instances to retain. Frequency How often the feed is generated. Valid frequency types are minutes, hours, days, and months.
[D]Table 7.8. HDFS Source and Target Feed Properties
Property Description Cluster The target cluster entity. Data Path Path of the HDFS data to be exported. Example: /weblogs/${YEAR}-${MONTH}-${DAY}-${HOUR}Statistics Path (Optional) Path to directory in which to store statistics. Start and End Times Date is entered in mm/dd/yyyy format. Time is set to a 12-hour scale. After the feed job starts, it continues at the given Frequency setting until reaching the end time. Retention Period to retain instances and number of instances to retain. Frequency How often the feed is generated. Valid frequency types are minutes, hours, days, and months.
[D]Table 7.9. RDBMS Import Source and Target Feed Properties
Property Description Datasource Connection information for a remote data source, such as an RDBMS. Table Name of the RDBMS table to be imported or exported. Extract Type Options are Full or Incremental Merge Type Options are Snapshot or Append Columns Select to have all columns replicated, or enter the specific columns to include or exclude. Location Options are HDFS or Hive Cluster The target cluster entity. Data Path (HDFS only) Path of the HDFS data to be exported. Example: /weblogs/${YEAR}-${MONTH}-${DAY}-${HOUR}Statistics Path (HDFS only--optional) Path to directory in which to store statistics. Table URI (Hive only) Metadata catalog specification for the Hive table, in the metadata format catalog:. Example: catalog:logs-db:clicks#ds=${YEAR}-${MONTH}-${DAY}$database_name:$table#(partition-key=partition-value);+Start and End Times Date is entered in mm/dd/yyyy format. Time is set to a 12-hour scale. After the feed job starts, it continues at the given Frequency setting until reaching the end time. Retention Period to retain instances and number of instances to retain. Frequency How often the feed is generated. Valid frequency types are minutes, hours, days, and months. Table 7.10. RDBMS Export Source and Target Feed Properties
Property Description Location Options are HDFS or Hive Cluster The target cluster entity. Data Path (HDFS only) Path of the HDFS data to be exported. Example: /weblogs/${YEAR}-${MONTH}-${DAY}-${HOUR}Statistics Path (HDFS only--optional) Path to directory in which to store statistics. Table URI (Hive only) Metadata catalog specification for the Hive table, in the metadata format catalog:. Example: catalog:logs-db:clicks#ds=${YEAR}-${MONTH}-${DAY}$database_name:$table#(partition-key=partition-value);+Start and End Times Date is entered in mm/dd/yyyy format. Time is set to a 12-hour scale. After the feed job starts, it continues at the given Frequency setting until reaching the end time. Retention Period to retain instances and number of instances to retain. Datasource Connection information for a remote data source, such as an RDBMS. Table Name of the RDBMS table to be imported or exported. Load Method Options are Update Only or Allow Insert. Indicates whether rows can be inserted into the RDBMS or only updates to existing rows are allowed. Columns Select to have all columns replicated, or enter the specific columns to include or exclude. Frequency How often the feed is generated. Valid frequency types are minutes, hours, days, and months.
[D]Table 7.11. Advanced Feed Properties
Property Description Queue Name Hadoop job queue. Job Priority Hadoop job priority. Late Arrival Cutoff The timeframe within which a dataset feed can arrive late and still be processed. The feed instance is rerun within the time specified to capture any late arriving data. Availability Flag Specifies the name of a file that when present in a feed's data directory, determines that the feed is available. Max Map Jobs The maximum number of maps used during replication. This setting impacts performance and throttling. Max Bandwidth The bandwidth in MB/s used by each mapper during replication. This setting impacts performance and throttling. Parallel The concurrent replication instances that can run at any given time. This setting impacts performance and throttling. Access Control List
Specify the HDFS access permissions. The owner must be the owner of the Falcon
stagingandworkingdirectories.Feed Schema
Specify the schema location and provider. This is required for HDFS. If none, enter
/none.Click Next to view a summary of your feed entity definition.
(Optional) Click Preview XML to review or edit the entity definition in XML.
After verifying the feed entity definition, click Save.
The entity is automatically submitted for verification, but it is not scheduled to run.
Verify that you successfully created the feed entity.
Type the feed entity name in the Falcon web UI Search field and press Enter.
If the feed entity name appears in the search results, it was successfully created.
For more information about the search function, see "Locating and Managing Entities" in Using Advanced Falcon Features.
Schedule the entity.
In the search results, click the checkbox next to an entity name with status of
Submitted.Click Schedule.
After a few seconds a success message displays.
Creating a Process Entity Definition Using the Web UI
The process entity consumes the feeds, invokes processing logic, and can produce additional feeds. For more information, see the Apache process entity XSD.
You can use one script to work on many different Falcon-defined processes. This helps reduce code complexity and makes it easier to manage multiple workflows. Although you can call complicated Oozie workflows with one Falcon job, we recommend that you split up the complex Oozie workflows into modular steps. This helps Falcon better manage retention of any intermediary datasets. It also allows for reuse of Processes and Feeds.
When submitting a workflow.xml file as part of a process
entity definition, ensure the following:
The
workflow.xmlpath is absolute.The file is in a location that is readable by the user submitting the entity and by service user "falcon".
Steps:
At the top of the Falcon web UI page, click Create > Process.
On the New Process page, specify the values for the following properties:
Table 7.12. General Process Properties
Property
Description
Process Name
Name of the process entity. Must be unique for the cluster. Cannot be changed after the entity is created.
Tags
Optional business labels, such as "Finance." There is no input validation on this field, so there can be duplicates.
Table 7.13. Process Detail and Engine Properties
Property
Description
Engine
Specify which workflow engine to use. Choices are Spark, Oozie, Pig, and Hive. Some properties for the entity might change, depending on the engine selected.
Workflow Name
The name of the workflow to be used. The naming criteria are as follows:
Must be unique to the data center
Must start with a letter
Is case sensitive
Can contain 2 to 100 characters
Can include numbers
Can use a dash (-) but no other special characters
Cannot contain spaces
Workflow Path
The path to the workflow engine on HDFS. The workflow path must be absolute, and the workflow file must be in a location that is readable by the user submitting the entity and by user "Falcon".
For example, if you are using a Pig script to define the workflow, you can set the path to
/apps/clickstream/clean-script.pig. The workflow definition on HDFS contains the actual job that should run and it should conform to the workflow specification of the engine specified. The libraries required by the workflow should be in the/libfolder inside the workflow path.Cluster
Select an existing cluster entity to specify where the workflow runs.
Inputs The input data for the workflow. Each input maps to a feed. The path and frequency of input data is picked up from the feed entity definition. Feeds with Hive table storage can be used as inputs to a process. The workflow job starts only if all the inputs are available.
Outputs The output data that is generated by the workflow. Each output is mapped to a feed and the output path is picked up from the feed definition.
Name Name of the Spark application. The naming criteria are as follows:
Must start with a letter
Can contain 2-40 characters
Can include numbers
Can use a dash (-) but no other special characters
Cannot contain spaces
Application (Spark only) Specifies the
.jaror Python file to be executed by Spark. Enter a valid HDFS path, including the file name.Main Class (Spark only) The main class for the
.jarfile specified. If the entry does not conform to a valid Java class name, the process cannot be submitted and a message is displayed: Please enter your application's main class name.Runs On (Spark only) Determines whether the application runs through YARN or locally on the Spark Master daemon. If the process is submitted with a master unreachable, the process is flagged as non-executable.
Mode (Spark only) Only available if Spark is running on YARN. If run in cluster mode, it runs remotely on an ApplicationMaster. In client mode, the driver process runs locally.
Important: The
yarn-clientexecution mode for the Oozie Spark action is no longer supported. Oozie and Falcon continue to supportyarn-clustermode.Spark Options (Spark only) Enter any Spark options you want to implement with this process.
Spark Arguments (Spark only)
Enter the arguments for the Spark options.
Run Duration Start and End Combined with the frequency value to determine the window of time in which a Falcon job can execute. The times at which the process begins and finishes. The workflow job starts executing after the schedule time and when all the inputs are available.The workflow ends before the specified end time, so there is not a workflow instance at end time. Also known as validity time.
Frequency How often the process is generated. Valid frequency types are minutes, hours, days, and months.
Timezone
The timezone is associated with the duration start and end times. Default timezone is UTC.
Table 7.14. Advanced Process Properties
Property
Description
Retry Policy Type
Defines how the workflow failures should be handled. Options are Periodic, Exponential Backup, and None.
Delay Up to
The time period after which a retry attempt is made. For example, an Attempt value of 3 and Delay value of 10 minutes would cause the workflow retry to occur after 10 minutes, 20 minutes, and 30 minutes after the start time of the workflow.
Attempts
How many times the retry policy should be implemented before the job fails.
Max Parallel Instances
How many instances of the workflow can run concurrently. Must be greater than 0. For example, a value of 2 allows two instances of the workflow to run at the same time; the next instance starts only after the running instance completes.
Order
The order in which the ready instances are picked up. Options are First-in-first-out (FIFO), Last-in-first-out (LIFO), and Last_Only.
Properties
Enter the name and value for any properties you want to assign to this process.
Access Control List
Specify the HDFS owner, group, and access permissions for the cluster. Default permissions are 755 (rwx/r-x/r-x). The owner must be the owner of the Falcon
stagingandworkingdirectories.Click Next to view a summary of your process entity definition.
(Optional) Click Preview XML to review or edit the entity definition in XML.
After verifying the entity definition, click Save.
The entity is automatically submitted for verification, but it is not scheduled to run.
Verify that you successfully created the process entity.
Type the entity name in the Falcon web UI Search field and press Enter.
If the entity name appears in the search results, it was successfully created.
For more information about the search function, see "Locating and Managing Entities" in Using Advanced Falcon Features.
Schedule the entity.
In the search results, click the checkbox next to an entity name with status of
Submitted.Click Schedule.
After a few seconds a success message displays.
Scheduling or Pausing an Entity Using the Web UI
When you create a Falcon entity in the web UI, the entity is automatically submitted to the cluster servers you specified when creating the entity. When submitted, the entity is added to the configuration store in Falcon and several validations are run against the entity definition. However, the entity must be manually scheduled before a job can run.
When you schedule an entity, the workflow and library you specified are copied to the staging path you created, and the scheduler references the workflow and library from that staging path.
![[Note]](../common/images/admon/note.png) | Note |
|---|---|
You must have completed the section called “Creating HDFS Directories for Falcon” prior to submitting the Falcon entities. |
Use the Search field to locate the entity you want schedule.
In the search results list, click the checkbox next to the names of the feeds or processes with status Submitted that you want to schedule and then click Schedule.
After a few seconds, you should receive a success message for each entity.
To suspend a scheduled entity, click the checkbox next to the names of the feeds or processes with status Running and then click Pause.
You should receive a success message for each entity.
Defining Entities Using the CLI
You can manually create your Falcon entity definition files and workflow files, then submit and execute them from the CLI.
Prerequisites
Before you can begin working with Falcon, ensure that you have the following components installed on your cluster:
Hortonworks Data Platform (HDP)
Apache Falcon
See Non-Ambari Cluster Installation Guide or Ambari Automated Install Guide for Falcon installation instructions.
Apache Oozie client and server
Steps
To create a data pipeline, you must perform the following actions:
Creating a Cluster Entity Definition Using the CLI
Create the cluster specification XML file, also known as a cluster entity. There are several items to define in a cluster entity.
In the example cluster entity provided below, the following properties are defined:
Colo: Name of the Data Center
Name: File name of the Data Center
<interface>: Specify the interface type
| Important |
|---|---|
Ensure that the required HDFS directories have been created. Permissions on the cluster staging directory must be set to 777 (read/write/execute for owner/group/others). Only Oozie job definitions are written to the staging directory so setting permissions to 777 does not create any vulnerability. Keep the working directory permissions set to 755 (rwx/r-w/r-w). |
<?xml version="1.0"?>
<!--
   Cluster Example
 -->
<cluster colo="$MyDataCenter" description="description" name="$MyDataCenter">
  <interfaces>
    <interface type="readonly" endpoint="hftp://nn:50070" version="2.4.2" /> <!-- Required for distcp for replications. -->
    <interface type="write" endpoint="hdfs://nn:8020" version="2.4.2" /> <!-- Needed for writing to HDFS-->
    <interface type="execute" endpoint="rm:8050" version="2.4.2" /> <!-- Needed to write to jobs as MapReduce-->
    <interface type="workflow" endpoint="http://os:11000/oozie/" version="4.0.0" /> <!-- Required. Submits Oozie jobs.-->
    <interface type=”registry" endpoint="thrift://hms:9083" version="0.13.0" /> <!--Register/deregister partitions in the Hive Metastore and get events on partition availability
-->
    <interface type="messaging" endpoint="tcp://mq:61616?daemon=true" version="5.1.6" /> <!--Needed for alerts-->
  </interfaces>
  <locations>
    <location name="staging" path="/apps/falcon/prod-cluster/staging" /> <!--HDFS directories used by the Falcon server-->
    <location name="temp" path="/tmp" />
    <location name="working" path="/apps/falcon/prod-cluster/working" />
  </locations>
</cluster> | Note |
|---|---|
Additional properties must be set if you are configuring for a secure cluster. For more information, see "Configuring for Secure Clusters" in the Non-Ambari Cluster Installation guide. |
For more information, see the Apache cluster entity XSD.
Creating a Feed Entity Definition Using the CLI
Create a dataset specification XML file, or feed entity:
Reference the cluster entity to determine which clusters the feed uses.
<frequency>: Specify the frequency of the feed.
<retention limit>: Choose a retention policy for the data to remain on the cluster.
<location>: Provide the HDFS path to the files.
Optional. Specify an Email Notification. The email notification tag must be placed before the <ACL> tag.
<ACL owner>: Specify the HDFS access permissions.
Optional. Specify a Late Data Handling cut-off.
<?xml version="1.0"?>
<!--
   Feed Example
 -->
<feed description="$rawInputFeed" name=”testFeed” xmlns="uri:falcon:feed:0.1">
  <frequency>hours(1)</frequency> <!--Feed run frequency-->
  <late-arrival cut-off="hours(6)”/> <!-- Late arrival cut-off -->
  <groups>churnAnalysisFeeds</groups> <!--Feed group, feeds can belong to multiple groups -->
  <tags externalSource=$MyEDW, externalTarget=Marketing> <!-- Metadata tagging -->
  <clusters> <!-- Target clusters for retention and replication. -->
    <cluster name="$MyDataCenter" type="source">
      <validity start="$date" end="$date"/>
      <retention limit="days($n)" action="delete"> <!--Currently delete is the only action available -->
    </cluster>
    <cluster name="$MyDataCenter-secondary" type="target">
      <validity start="2012-01-01T00:00Z" end="2099-12-31T00:00Z"/>
      <location type="data” path="/churn/weblogs/${YEAR}-${MONTH}-${DAY}-${HOUR} "/>
	  <retention limit="days(7)" action="delete"/>
    </cluster>
  </clusters>
  <locations> <!-- Global location across clusters - HDFS paths or Hive tables -->
    <location type="data" path="/weblogs/${YEAR}-${MONTH}-${DAY}-${HOUR} "/>
  </locations>
  <notification type="email" to="falcon@xyz.com"/>
  <ACL owner="hdfs" group="users" permission="0755"/>  <!-- Required for HDFS. -->
  <schema location="/none" provider="none"/> <!-- Required for HDFS. -->
</feed>
For more information, see the Apache feed entity XSD.
Creating a Process Entity Definition Using the CLI
When submitting a workflow.xml file as part of a process
entity definition, ensure the following:
The
workflow.xmlpath is absolute.The file is in a location that is readable by the user submitting the entity and by service user "falcon".
Create the process specification XML file:
<cluster name>: Reference the cluster entity to define where the process runs.
<feed>: Reference the feed entity to define the datasets that the process uses.
Optional. Specify Late Data Handling policies or a Retry Policy.
Optional. Specify an Email Notification.
<?xml version="1.0"?>
<!--
   Process Example
 -->
<process name="process-test" xmlns="uri:falcon:process:0.1”>
    <clusters>
      <cluster name="$MyDataCenter">
        <validity start="2011-11-02T00:00Z" end="2011-12-30T00:00Z"
      </cluster>
    </clusters>
    <parallel>1</parallel>
    <order>FIFO</order> <!--You can also use LIFO and LASTONLY but FIFO is recommended in most cases-->
    <frequency>days(1)</frequency>
    <inputs>
        <input end="today(0,0)" start="today(0,0)" feed="feed-clicks-raw" name="input" />
    </inputs>
    <outputs>
        <output instance="now(0,2)" feed="feed-clicks-clean" name="output" />
    </outputs>
    <workflow engine="pig" path="/apps/clickstream/clean-script.pig" />
    <retry policy="periodic" delay="minutes(10)" attempts="3"/>
    <late-process policy="exp-backoff" delay="hours(1)">
	  <late-input input="input" workflow-path="/apps/clickstream/late" />
    </late-process>
    <notification type="email" to="falcon@xyz.com, falcon_2@xyz.com"/>
</process> | Note |
|---|---|
LIFO and LASTONLY are also supported schedule changes for <order>. |
For more information, see the Apache process entity XSD.
Submitting and Scheduling an Entity Using the CLI
After creating the Falcon entities, you must submit and schedule the entities with the cluster servers you specified when creating the entities.
When you submit an entity, the entity is added to the configuration store in Falcon and several validations are run against the entity definition.
When you schedule an entity, the workflow and library you specified are copied to the staging path you created, and the scheduler references the workflow and library from that staging path.
| Note |
|---|---|
You must have completed the section called “Creating HDFS Directories for Falcon” prior to submitting the Falcon entities. |
You should receive a success message after submitting and scheduling each entity.
Submit your entities to Falcon, ensuring you specify the correct entity type for each file.
Submit your cluster entity.
For example, to submit
$sampleClusterFile.xml:falcon entity -type cluster -submit -file
$sampleClusterFile.xmlSubmit your dataset or feed entity.
For example, to submit
$sampleFeedFile.xml:falcon entity -type feed -submit -file
$sampleFeedFile.xmlSubmit your process entity.
For example, to submit
$sampleProcessFile.xml:falcon entity -type process -submit -file
$sampleProcessFile.xml
Schedule your feed and process entities.
Schedule your feed.
For example, to schedule
$feedName:falcon entity -type feed -schedule -name
$feedNameSchedule your process.
For example, to schedule
$processName:falcon entity -type process -schedule -name
$processName
Your data pipeline is now deployed with basic necessary information to run Oozie jobs, Spark jobs, Pig scripts, and Hive queries. You can now explore other sections such as Late Data Handling or Retry Policy.