Add Decision Control Nodes
You can use the Decision control nodes to direct the flow of actions in the workflow based on specific circumstances.
![[Note]](../common/images/admon/note.png) | Note |
|---|---|
If a variable is part of an EL expression, such as in a decision node, you might not be prompted for the value of the variable. In this case, it is best to add the variable in the Custom Job Properties in the Submit dialog box. |
Steps
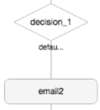
Add a Decision node by clicking on the connector in the graph, clicking the + icon, and selecting Decision.
A decision node is added to the workflow graph, with two decision branches (connectors).
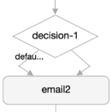
The branch labeled Default identifies the branch the workflow follows if the condition you identify is not met.
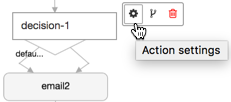
Click on the decision node, then click the Action Settings icon.
Add the conditions under which the workflow should progress to the next node in each branch of the workflow.
Conditions can be set on an action node, a kill node, or an end node.
Optional: Add a node to a decision branch.
Click on one of the connectors extending from the Decision node, then click the + icon.
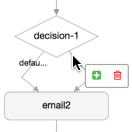
The Add Node dialog box displays.
Select a node to add to the branch and modify the node settings.

Optional: Add a node to the other branch.
![[Tip]](../common/images/admon/tip.png)
Tip You can nest decision nodes inside of decision nodes and can add forks to decision branches.
Optional: Delete a connector.
You cannot delete the connector that contains the Default setting.