For this example, we use a very simple triage rule to detect typosquatting.
Typosquatting uses common domain misspellings to install malicious web content.
-
Display the Management module user interface.
-
Select the Squid sensor from the list of sensors on the main window.
-
Click the pencil icon in the list of tool icons
 for the sensor.
The Management Module displays the Squid sensor panel.
-
Click the Advanced button.
-
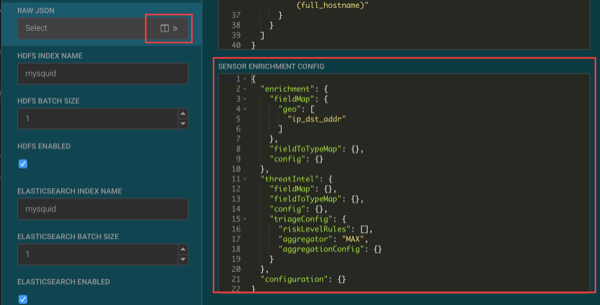
Click
 (expand window button) next to the RAW
JSON field.
(expand window button) next to the RAW
JSON field.
-
Replace the JSON information in the SENSOR ENRICHMENT CONFIG
section with the following JSON information:
{
	"enrichment": {
		"fieldMap": {
			"geo": [
				"ip_dst_addr"
			],
			"stellar": {
				"config": [
					"domain_without_tld := DOMAIN_REMOVE_TLD(domain_without_subdomains)",
					"is_potential_typosquat := BLOOM_EXISTS(OBJECT_GET('/tmp/reference/alexa10k_filter.ser'), domain_without_tld)",
					"domain_without_tld := null"
				]
			}
		},
		"fieldToTypeMap": {},
		"config": {}
	},
	"threatIntel": {
		"fieldMap": {
			"stellar": {
				"config": [
					"is_alert := (exists(is_alert) && is_alert) || is_potential_typosquat"
				]
			}
		},
		"fieldToTypeMap": {},
		"config": {},
		"triageConfig": {
			"riskLevelRules": [
				{
					"name": "Alexa 10k Typosquat Bloom",
					"comment": "Inspect a bloom filter with potentially typosquatted domains from the top Alexa 10k",
					"rule": "is_potential_typosquat != null && is_potential_typosquat",
					"score": 50,
					"reason": "FORMAT('%s is a potential typosquatted domain from the top 10k domains from alexa', domain_without_subdomains)"
				}
			],
			"aggregator": "MAX",
			"aggregationConfig": {}
		}
	},
	"configuration": {}
}
-
Click SAVE below the JSON information.
-
Click SAVE at the bottom of the Squid sensor configuration
panel.
-
Enter
cnn.com or nsp.com in the browser connected
to the HCP proxy.
-
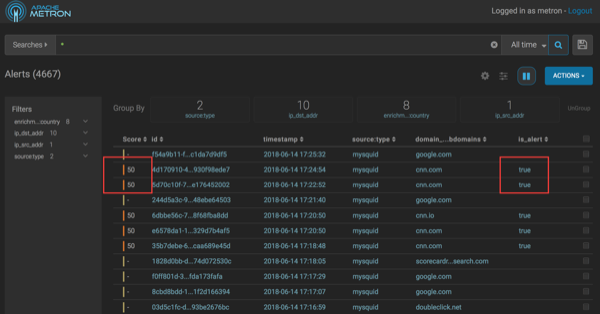
Display the Alerts UI.
In the Score column, you will see events with non-zero scores and the
is_alert field set to true.
-
If you want to view the columns as they appear in the screen shot, complete the
following:
-
Click the gear icon on the left of the Actions
button.
-
Check the Score, id,
timestamp, source:type,
domain_without_subdomains, and
is_alert fields.
-
Uncheck all other columns.
-
Click SAVE.
By default, the columns after the score,
id, and timestamp are
displayed from left to right in alphabetical order by field name.
-
To change the column order, click the up or down button to move the columns
displayed up or down.
-
Click SAVE.
-
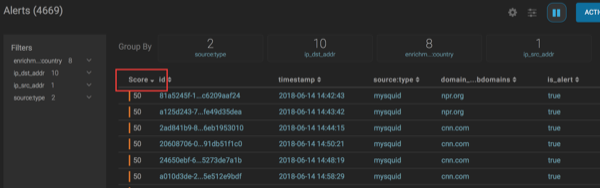
Click the Score header to sort the events ascending by
Score.
Click again to sort descending by Score. A downward arrow appears next to the
Score header when sorted descending by Score.
-
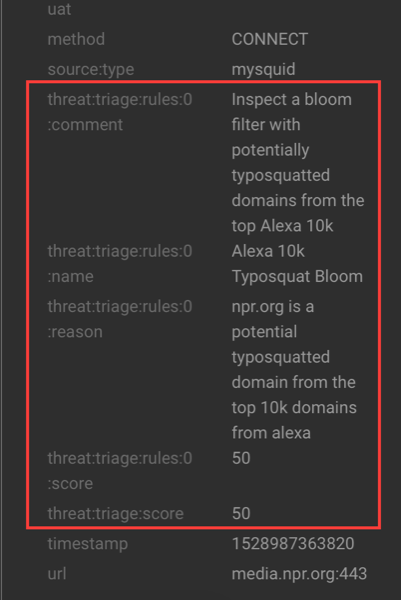
Click between the columns of one of the Scored alerts to view the alert details.
The fields beginning with threat:triage:rules show the
results of all the triage rules. The threat:triage:score field
is the aggregated score of the event. If there are more than one triage rule, this
field will contain the score combining the results from all the rules. The
is_alert field is set only if the triage rules indicate the
event is an alert.
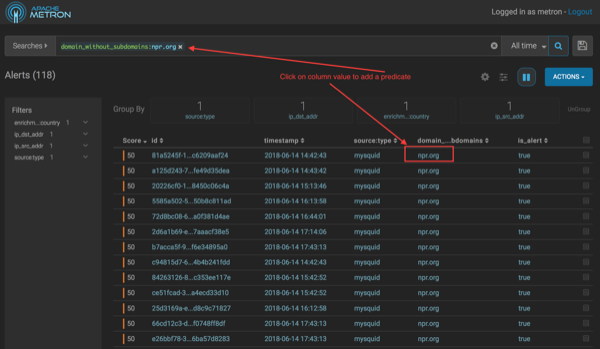
-
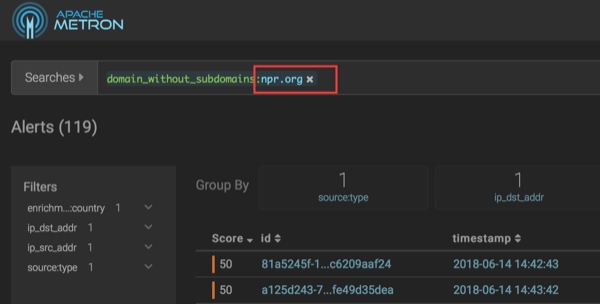
To see all the alerts for a particular domain, click the domain name.
The Alerts UI displays only the alerts with the selected domain name.
-
To remove a filter, click x next to the filter.
To view all events, click x on the Searches field.