DSS Installation
Also available as:
PDF

Install the Data Plane Profiler Agent

DSS requires that the DP Profiler Agent be installed on all custers. The Profiler is installed on the Ambari host, using an Ambari management pack (MPack). An MPack bundles service definitions, stack definitions, and stack add-on service definitions.

This task must be completed on all clusters to be used with DSS.
You must have root access to the Ambari Server host node to perform this task.
Important
Important
Prior to starting installation, you must have downloaded the required repository tarballs from the Hortonworks customer portal, following the instructions provided as part of the product procurement process. The repository tarballs for the Data Plane Profiler agent are different from the DSS app repository tarballs.
  1. Log in as root to an Ambari host on a cluster.
    ssh root@<ambari-ip-address>
  2. Install the Data Plane Profiler MPack by running the following command, replacing <mpack-file-name> with the name of the MPack.
    ambari-server install-mpack --mpack <mpack-file-name> --verbose 
  3. Restart the Ambari server.
    ambari-server restart
  4. Launch Ambari in a browser and log in.
    http://<ambari-server-host>:8080
    Default credentials are:
    • Username: admin
    • Password: admin
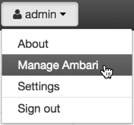
  5. Click Admin>Manage Ambari.

  6. Click Versions, and then do the following on the Versions page:
    1. Click the HDP version in the Name column.
    2. Change the Base URL path for the DSS service to point to the local repository, for example:
      http://webserver.com/DSS/centos7/1.1.0.0-X
    URLs shown are for example purposes only. Actual URLs might be different.
  7. Click the Ambari logo to return to the main Ambari page.
  8. In the Ambari Services navigation pane, click Actions>Add Service.

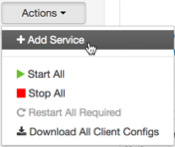
    The Add Service Wizard displays.
  9. On the Choose Services page of the Wizard, select the Dataplane Profiler service to install in Ambari, and then follow the on-screen instructions.
    Other required services are automatically selected.
  10. When prompted to confirm addition of dependent services, give a positive confirmation to all.
    This adds other required services.
  11. On the Assign Masters page, you can choose the default settings.
  12. On the Customize Services page, fill out the database details and other required fields that are highlighted.
    Make sure to enter the credentials that you set while configuring the external database. Change the username profileragent to the values set in the external database.
    Note
    Note
    Make sure to add the database driver to the machine based on the external database that you configured.
  13. If you are using Postgres as your external database, during installation, the mpack suggests an incorrect database url after selecting the database type, host, and user. Change the database url as follows:

    Suggested URL: jdbc:postgres://hostname:5432/profileragent

    Correct URL: jdbc:postgresql://hostname:5432/profileragent

  14. Complete the remaining installation wizard steps and exit the wizard.
  15. Ensure that all components required for your DPS service have started successfully.
  16. Open the quick link of the profiler for service verification.
  17. Add /profilers to the quick link URL.
    If the quick link is xyz:21900, change it to xyz:21900/profilers.
    Note
    Note
    For non-Kerberized clusters, this request returns the list of all registered profilers. For kerberos-enabled clusters, you will see an HTTP-401 response which is expected.
  18. After installing the profiler agent using Add Service Wizard in Ambari, the NodeManager hosts do not have the dpprofiler user. For Ambari to automatically create these users, restart all NodeManagers by going to Services->YARN->Restart NodeManagers (NodeManagers can be restarted in a rolling fashion - Ambari UI shows restart batching options)