

Create an interactive credential
Follow these steps to create an interactive credential.
The following video demonstrates how to create an interactive credential on Azure:

Prerequisites
Your account must have the Owner role in order for the interactive credential creation to work. If your account does not have the Owner role, you must use the app-based credential option instead of the interactive option.
Steps
- In the Cloudbreak web UI, select Credentials from the navigation pane.
- Click Create Credential.
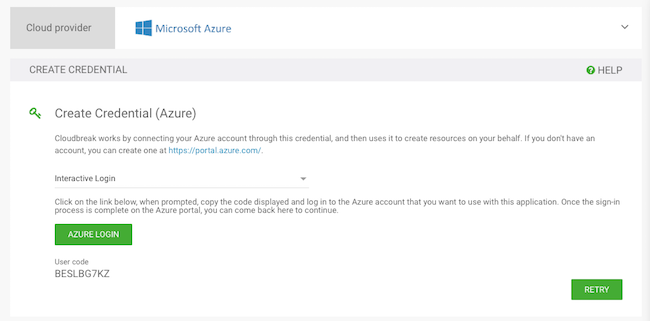
- Under Cloud provider, select “Microsoft Azure”.
- Select Interactive Login.
- Provide the following information:
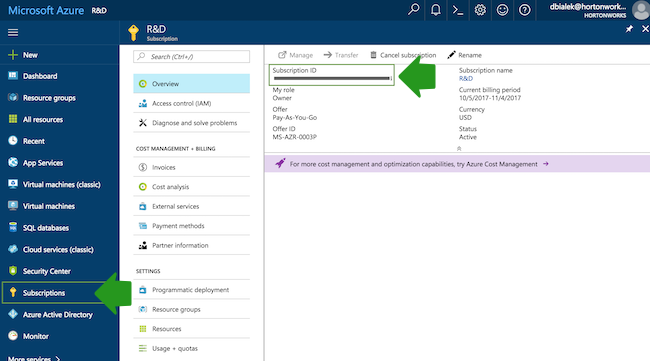
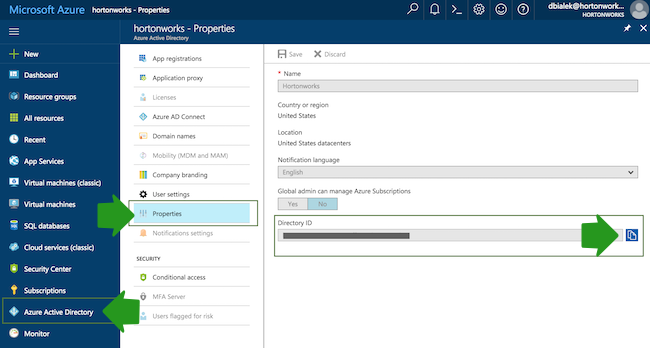
Parameter Description Name Enter a name for your credential. Description (Optional) Enter a description. Subscription Id Copy and paste the Subscription ID from your Subscriptions. Tenant Id Copy and paste your Directory ID from your Active Directory > Properties. Azure role type You have the following options: - “Use existing Contributor role” (default): If you select this option, Cloudbreak will use the Contributor role to create resources. This requires no further input.
- “Reuse existing custom role”: If you select this option and enter the name of an existing role, Cloudbreak will use this role to create resources.
- “Let Cloudbreak create a custom role”: If you select this option and enter a name for the new role, the role will be created. When choosing role name, make sure that there is no existing role with the name chosen. For information on creating custom roles, refer to Azure documentation.
To obtain the Subscription Id:
To obtain the Tenant ID (actually Directory Id):
- After providing the parameters, click Interactive Login.
- Copy the code provided in the UI:
- Click Azure login and a new Device login page will open in a new browser
tab:
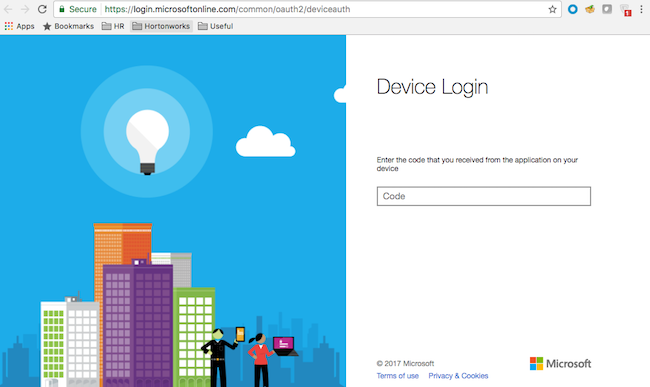
- Next, paste the code in field on the Device login page and click Continue.
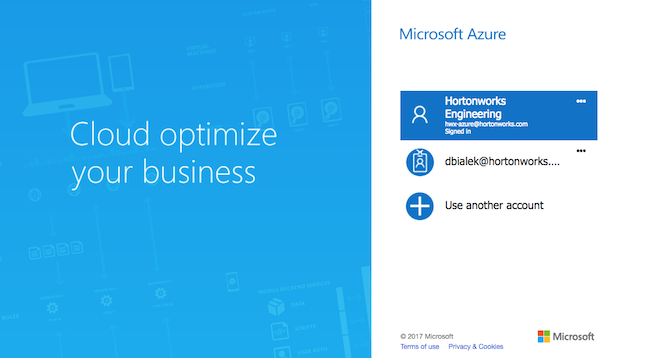
- Confirm your account by selecting it:
- A confirmation page will appear, confirming that you have signed in to the Microsoft
Azure Cross-platform Command Line Interface application on your device. You may now
close this window.
Now that you have created a credential, you can start creating clusters.