Quickstart on AWS
This quickstart documentation will help you get started with Cloudbreak.
Prerequisites
In order to launch Cloudbreak from the CloudFormation template you must:
-
Have an existing an AWS account. If you don't have an account, you can create one at https://aws.amazon.com/.
-
Import an existing SSH key pair or generate a new key pair in the AWS region which you are planning to use for launching Cloudbreak and clusters. If you don't have a key pair, refer to SSH key pair documentation to create or import a key pair.
Related links
SSH key pair
Launch Cloudbreak from the quickstart template
Launch Cloudbreak from a CloudFormation template by using the following steps. This is the quickstart deployment option.
Steps
-
Click on the link to launch the CloudFormation template that will create the AWS resources, including an EC2 Instance running Cloudbreak:
Region Link us-east-1 (N. Virginia) us-west-1 (N. California) us-west-2 (Oregon) eu-central-1 (Frankfurt) eu-west-1 (Dublin) sa-east-1 (São Paulo) ap-northeast-1 (Tokyo) ap-southeast-1 (Singapore) ap-southeast-2 (Sydney) -
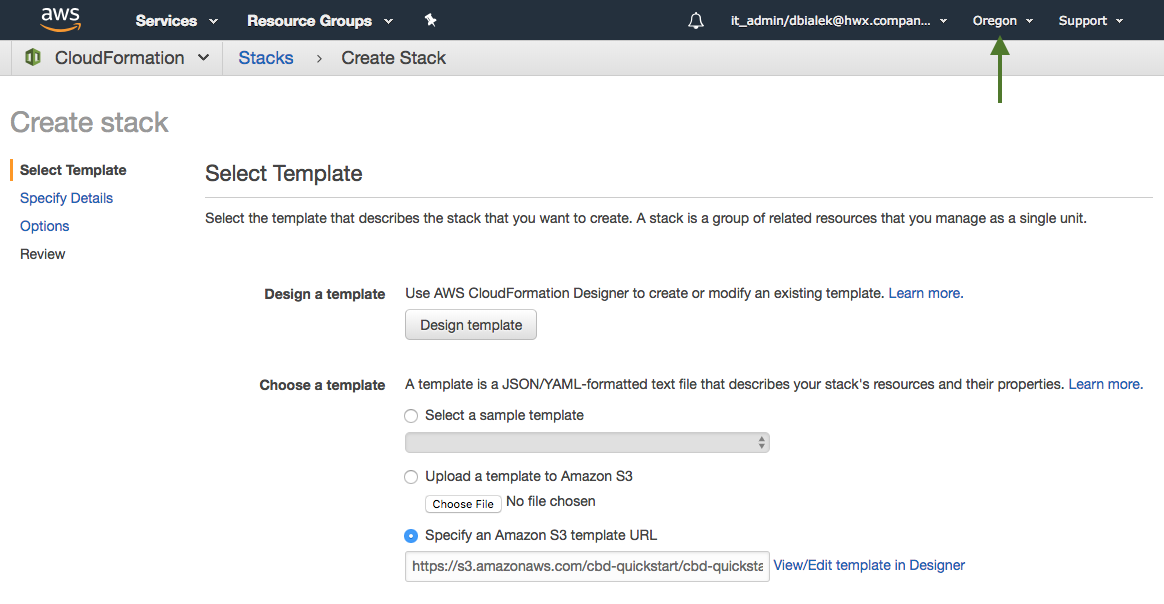
The Create stack wizard is launched in the Amazon CloudFormation management console:
-
You do not need to change any template parameters on the Select Template page, but check the region name in the top right corner to confirm the region in which you want to launch Cloudbreak:
If needed, you may change the region if needed by using the dropdown in the top right corner.
-
Click Next to display the Specify Details page.
-
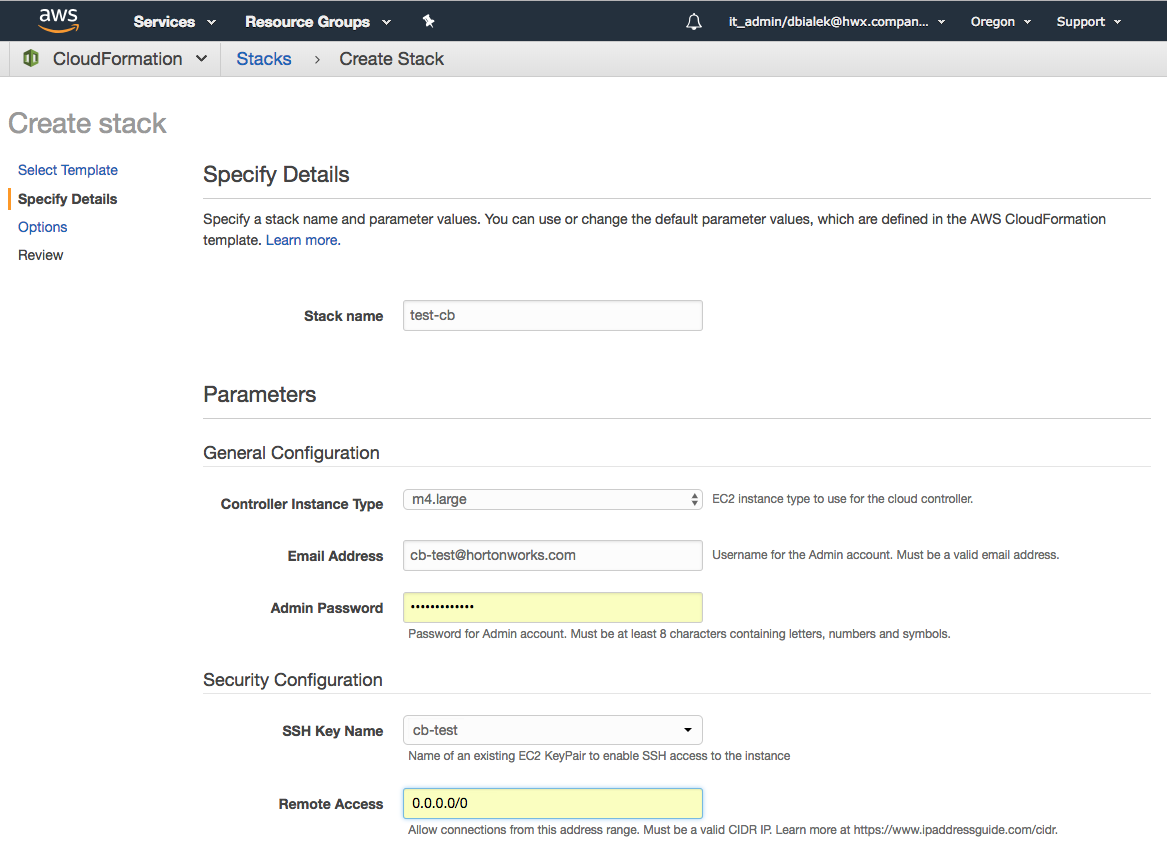
On the the Specify Details page, enter the following information:
Specify Details section
Parameter Description Stack name Enter name for your stack. It must be unique in your AWS environment. General Configuration
Parameter Description Controller Instance Type EC2 instance type to use for the cloud controller. Email Address Username for the Admin login. Must be a valid email address. Admin Password Password for Admin login. Must be at least 8 characters containing letters, numbers, and symbols. Security Configuration
Parameter Description SSH Key Name Name of an existing EC2 key pair to enable SSH to access the instances. Key pairs are region-specific, so only the key pairs that you created for a selected region will appear in the dropdown.If you don't have a key pair, refer to SSH key pair. Remote Access Allow connections to the cloud controller ports from this address range. Must be a valid CIDR IP. For example: - 192.168.27.0/24 will allow access from 192.168.27.0 through 192.168.27.255.
- 192.168.27.10/32 will allow access from 192.168.27.10.
- 0.0.0.0/0 will allow access from all.
-
Click Next to display the Options page.
-
On he Options page, if you expand the Advanced section, there is an option to Rollback on failure.
- By default, this option is set to Yes, which means that if there are any event failures when creating the stack, all the AWS resources created so far are deleted (i.e rolled back) to avoid unnecessary charges.
- If you set this option to No, if there are any event failures when creating the stack, the resources are left intact (i.e. not rolled back). Select the No option to aid in troubleshooting. Note that in this case you are responsible for deleting the stack later.
-
Click Next to display the Review page.
-
On the Review page, click the I acknowledge... checkbox.
-
Click Create.
The Stack Name is shown in the table with a CREATE_IN_PROGRESS status. You can click on the Stack Name and see the specific events that are in progress. The create process takes about 10 minutes and once ready, you will see CREATE_COMPLETE.
Cleaning up after a failed deployment
For steps on how to delete Cloudbreak after a failed deployment, refer to Delete Cloudbreak on AWS.
Related links
Delete Cloudbreak on AWS
Network security
SSH key pair
CIDR IP (External)
Access Cloudbreak web UI
Follow these steps to obtain Cloudbreak VM's public IP address and log in to the Cloudbreak web UI.
Steps
-
Once the stack creation is complete, Cloudbreak is ready to use. You can obtain the URL to Cloudbreak from the Outputs tab:
If the Outputs tab is blank, refresh the page.
-
Paste the link in your browser's address bar.
-
Confirm the security exception to proceed to the Cloudbreak web UI.
The first time you access Cloudbreak UI, Cloudbreak will automatically generate a self-signed certificate, due to which your browser will warn you about an untrusted connection and will ask you to confirm a security exception.
Browser Steps Firefox Click Advanced > Click Add Exception... > Click Confirm Security Exception Safari Click Continue Chrome Click Advanced > Click Proceed... -
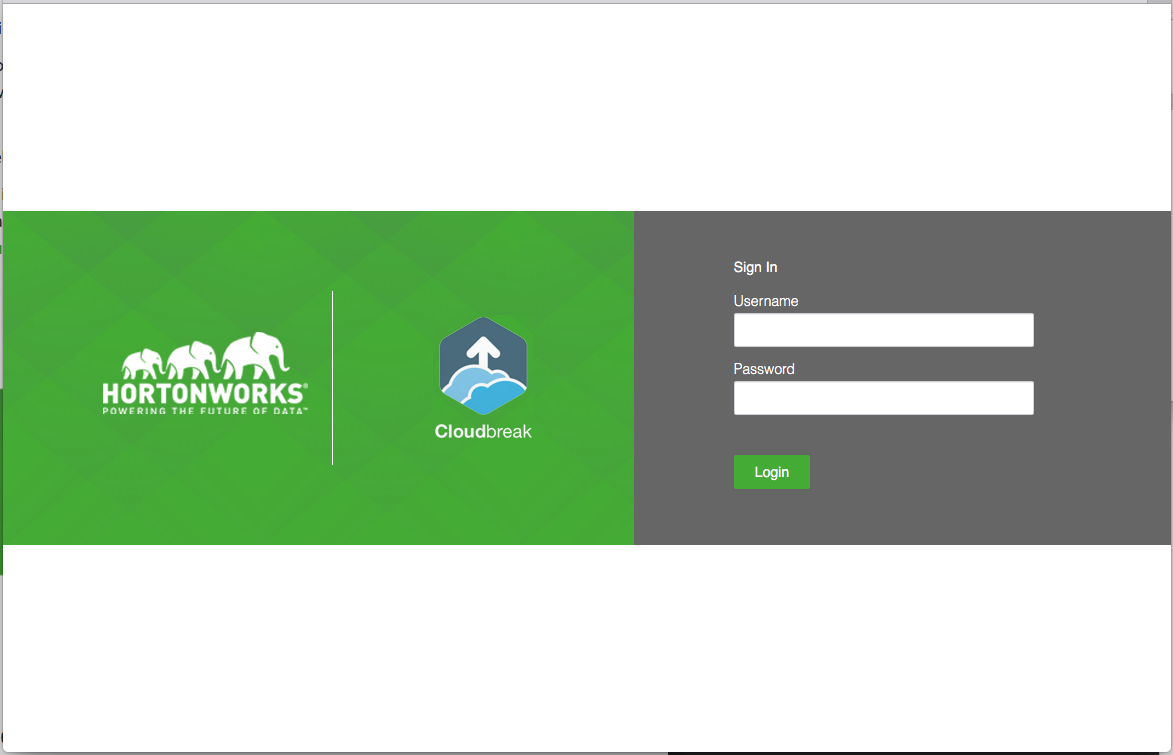
The login page is displayed:
-
Log in to the Cloudbreak web UI using the credential that you configured in the CloudFormation template.
-
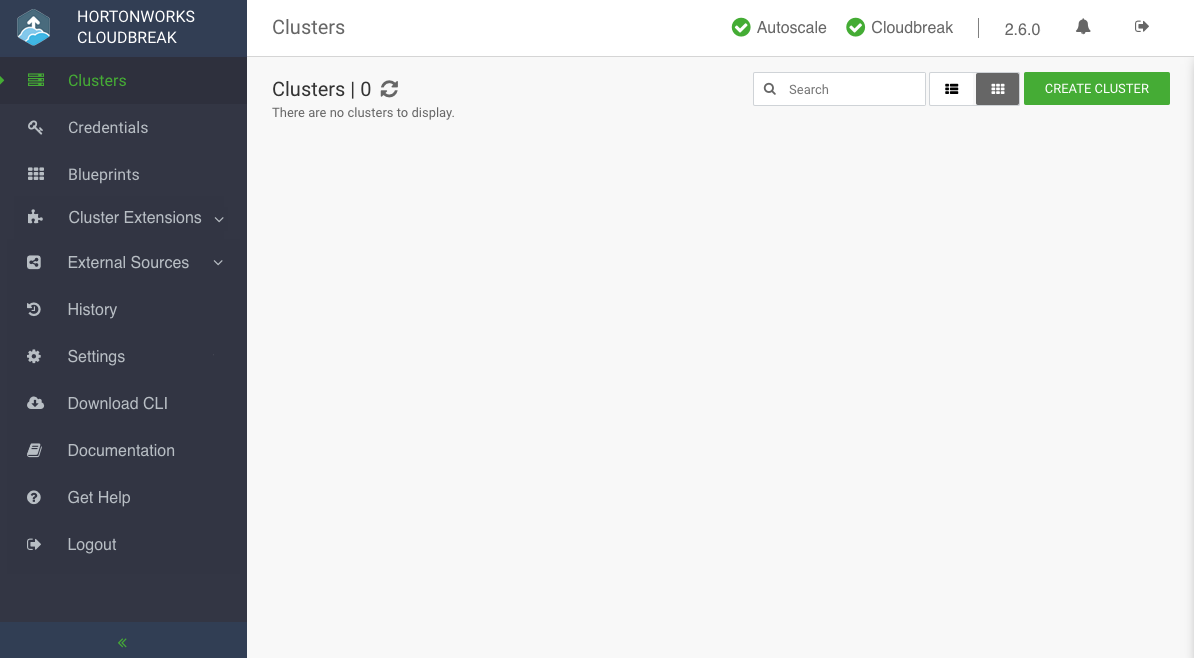
Upon a successful login, you are redirected to the dashboard:
Create Cloudbreak credential
Before you can start using Cloudbreak to create clusters, you must create a Cloudbreak credential. Cloudbreak credential allows Cloudbreak to authenticate with your AWS account and provision resources on your behalf.
Prerequisites
In order to use the key-based Cloudbreak credential:
-
You must have an access key and secret key. For information on how to generate it, refer to Use key-based authentication.
-
Your AWS user must have the minimum permissions described in Create CredentialRole as well as the permission to create an IAM role.
If you are unable to obtain these permissions for your AWS user, you must use role-based authentication instead of key-based authentication. If you would like to review both options, refer to Authentication.
Steps
-
In the Cloudbreak web UI, select Credentials from the navigation pane.
-
Click Create Credential.
-
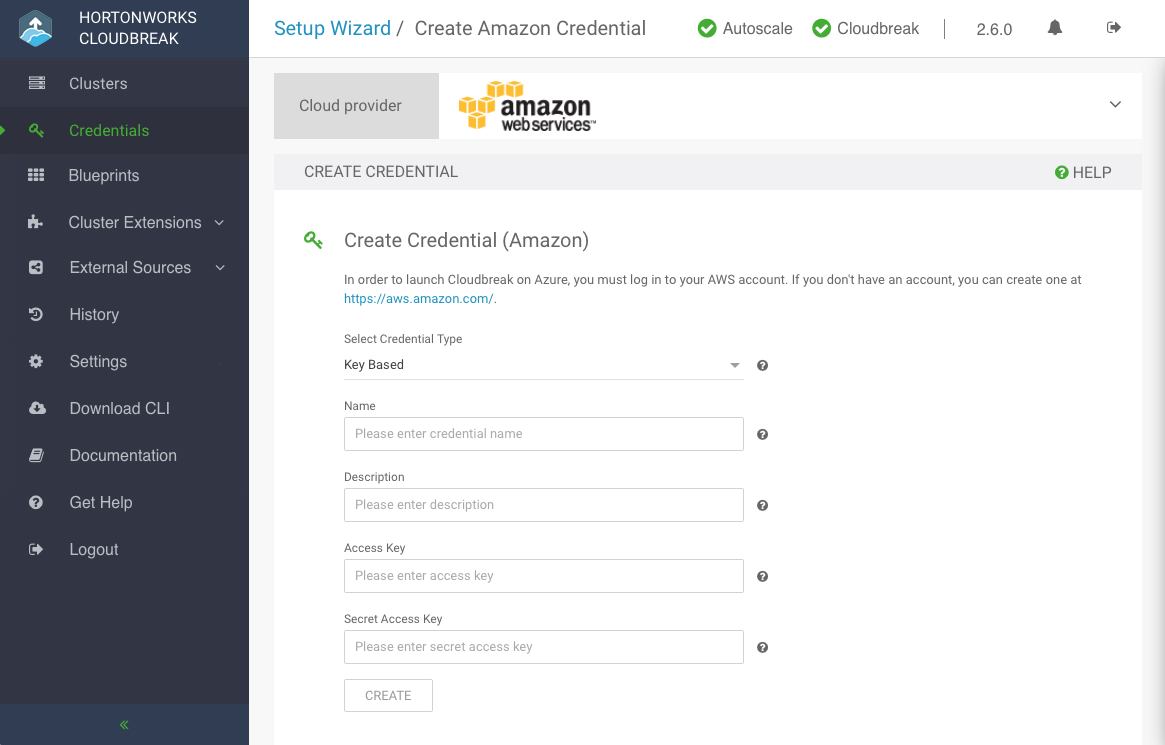
Under Cloud provider, select "Amazon Web Services":
-
Provide the following information:
Parameter Description Select Credential Type Select Key Based. Name Enter a name for your credential. Description (Optional) Enter a description. Access Key Paste your access key. Secret Access Key Paste your secret key. -
Click Create.
-
Your credential should now be displayed in the Credentials pane.
Congratulations! You've successfully launched Cloudbreak and create a Cloudbreak credential. Now you can start creating clusters.
Related links
Authentication
Use key-based authentication
Use role-based authentication
Create CredentialRole
Create a cluster
Use these steps to create a cluster. This section only covers minimal steps required for creating a cluster based on the basic settings (2-node cluster with default hardware and storage options).
Steps
-
Click the Create Cluster button and the Create Cluster wizard is displayed.
By default, Basic view is displayed. -
On the General Configuration page:
- Cluster Name: Enter a name for your cluster. The name must be between 5 and 40 characters, must start with a letter, and must only include lowercase letters, numbers, and hyphens.
- Region: Select the region in which you would like to launch your cluster.
- Cluster Type: Choose one of default cluster configurations.
-
Click Next three times to navigate to the Security Page. You do not need to enter anything on the Hardware and Storage and Network because by default Cloudbreak suggests the instance types, storage, and network to use (a new network and subnet is created by default).
-
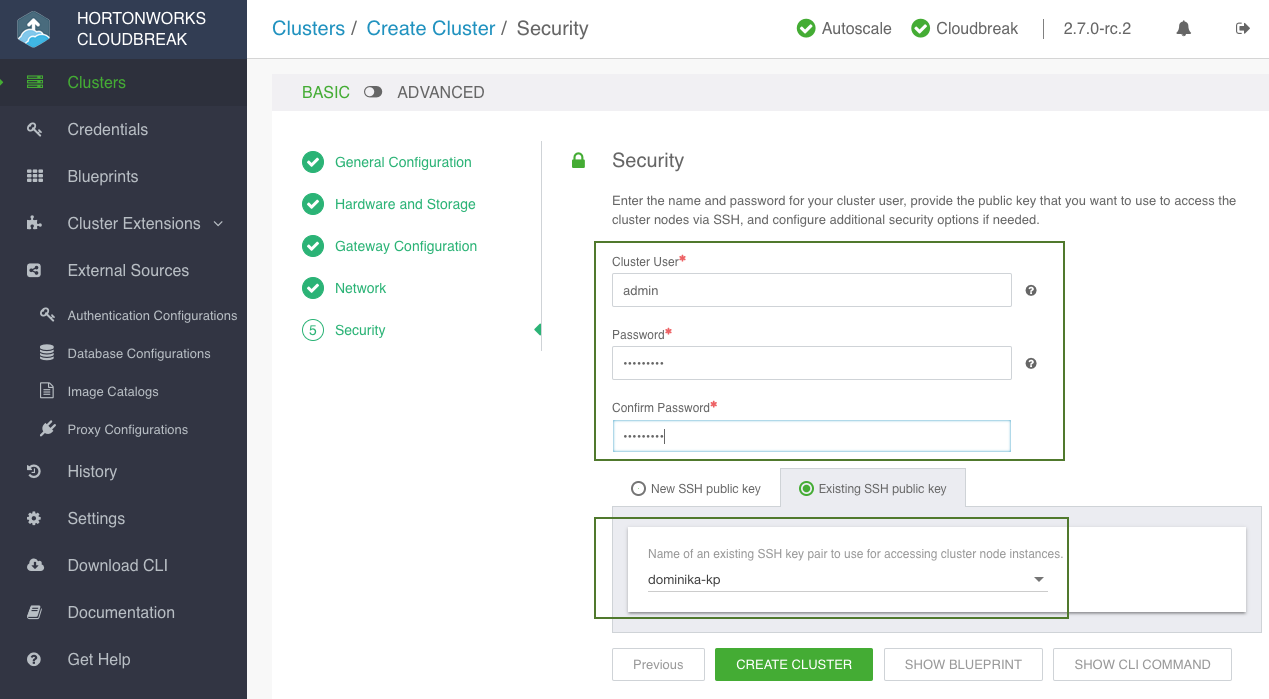
One the Security page, provide the following:
- Cluster User: This will be the user that you should use to log in to Ambari and other cluster UIs. By default, this is
admin. - Cluster Password: Password for the cluster user.
- SSH public key: Select the existing public SSH key or paste your key. The key will be placed on the cluster VMs so that you can use the matching private key to access the VMs via SSH.
- Cluster User: This will be the user that you should use to log in to Ambari and other cluster UIs. By default, this is
-
Click on Create Cluster to create a cluster.
-
You will be redirected to the Cloudbreak dashboard, and a new tile representing your cluster will appear at the top of the page.
Next steps
To learn how to access your cluster, refer to Accessing a cluster.
To learn how to use Cloudbreak to manage your cluster, refer to Managing and monitoring clusters.
