
Set up YARN workflow queues
To set up Capacity Scheduler queues on a view instance.
-
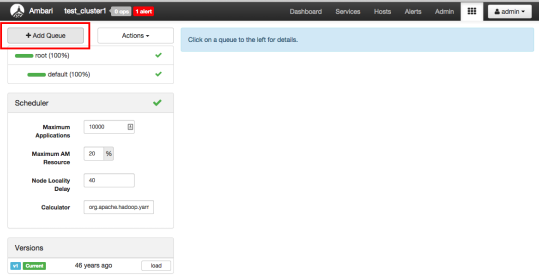
On the YARN Queue Manager view instance configuration page, click Add
Queue.
To return to a previously created YARN Queue Manager view instance:
-
Click the applicable YARN Queue Manager view instance, then click
Go to instance at the top of the page.
The queue will be added under the top-level, or root queue. A default queue already exists under the root queue.
-
Click the applicable YARN Queue Manager view instance, then click
Go to instance at the top of the page.
-
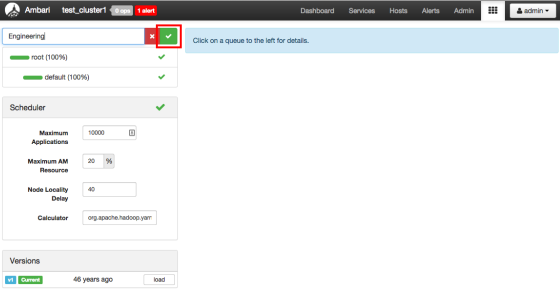
Type in a name for the new queue, then click the green check mark to create the
queue.
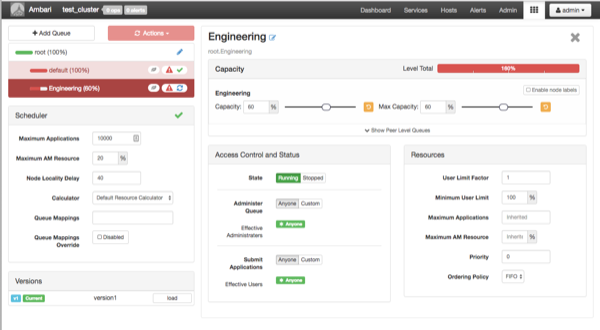
In the following example, we're creating a queue named Engineering.
 The Engineering queue is added, and its configuration page appears.
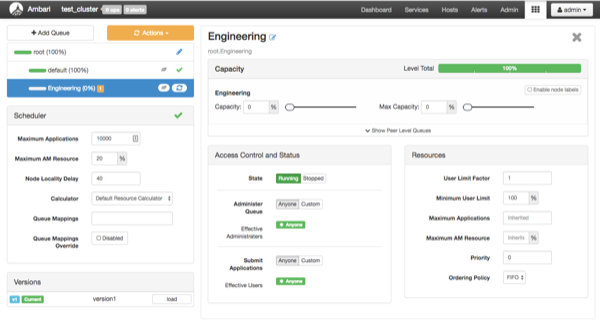
-
Set the capacity for the Engineering queue to 60%.
The sum of queue capacities at any level in the YARN Queue Manager configuration must total 100%. Here the default queue is already set to 100%. Therefore, if we try to set the Engineering queue capacity to 60%, error messages appear warning that the total at this level is 160%.
-
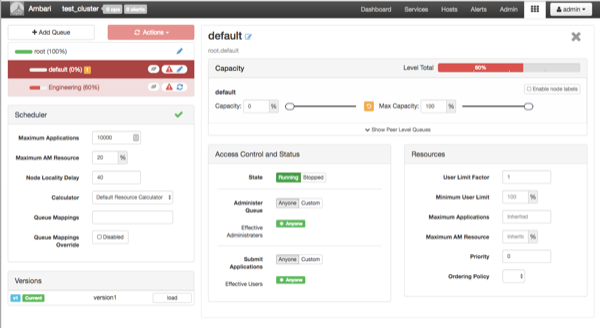
If we click the Default queue and set its capacity to 0%,
the Level Total bar at the top of the page lists the total
queue capacity at this level as 60%.
-
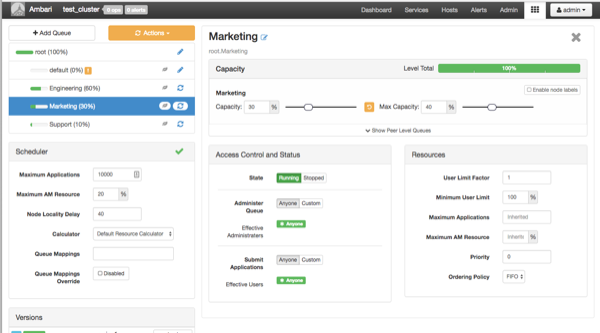
To add more queues at the root level, click the root queue,
then click Add Queue.
In the following example, we have added a Support queue set to 10% of the level capacity, and a Marketing queue set to 30%. The root-level queue capacities now total 100%.
-
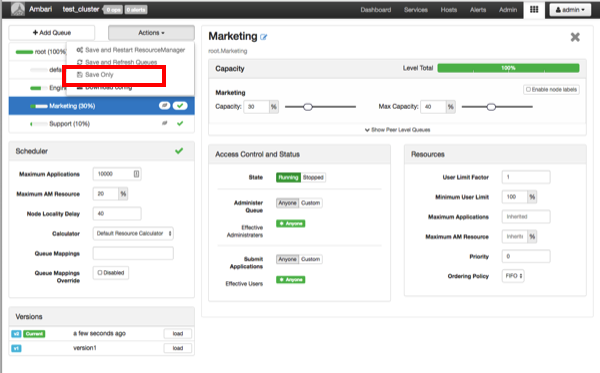
On the Notes pop-up, enter an optional description of your
changes, then click Save.
Each version is retained and listed in the Versions box.
-
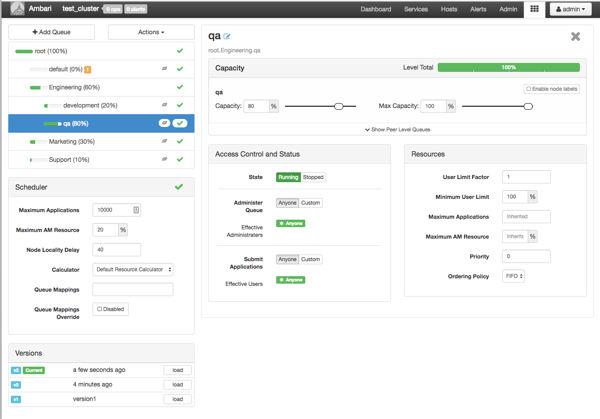
To build a queue hierarchy, click a top-level queue, then click Add
Queue.
In the following example, the qa and development queues have been added under the Engineering queue.