
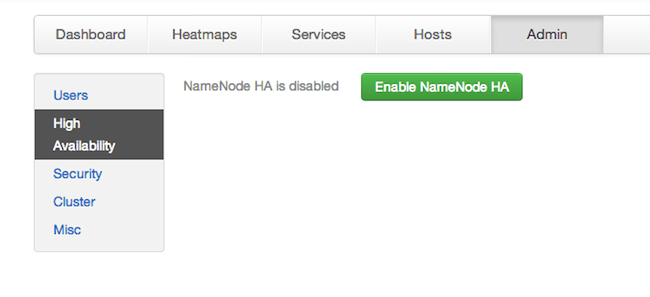
On Ambari Web, go to the Admin view. Select High Availabilty in the left nav bar.
Check to make sure you have at least three hosts in your cluster and are running at least three ZooKeeper servers.
Click Enable NameNode HA and follow the Enable NameNode HA Wizard. The wizard describes a set of automated and manual steps you must take to set up NameNode high availability.
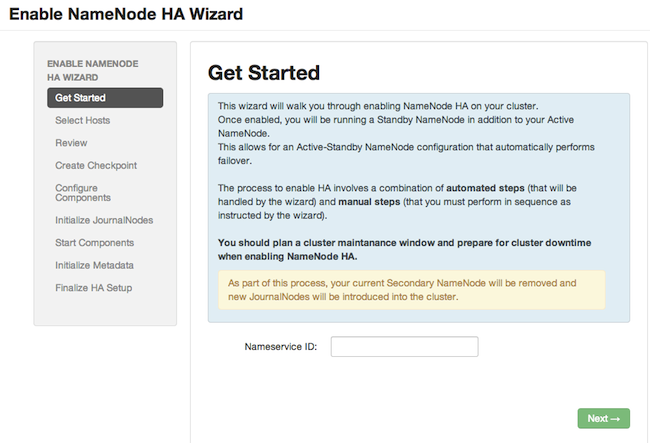
Get Started: This step gives you an overview of the process and allows you to select a Nameservice ID. You use this Nameservice ID instead of the NameNode FQDN once HA has been set up. Click Next to proceed.
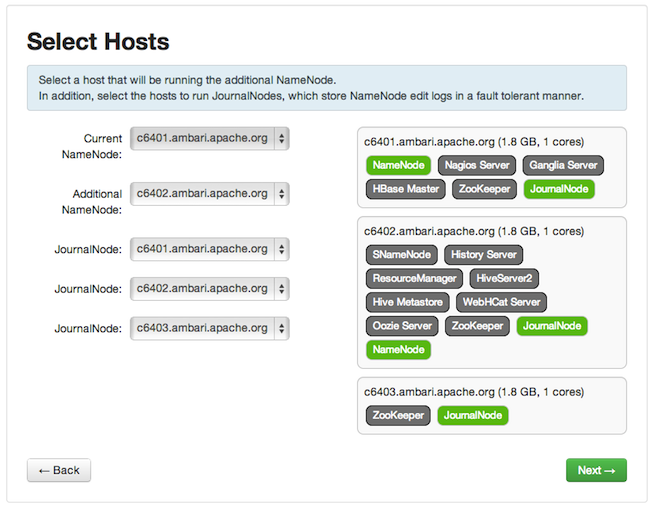
Select Hosts: Select a host for the additional NameNode and the JournalNodes. The wizard suggests options, but you can adjust using the dropdown lists. Click Next to proceed.
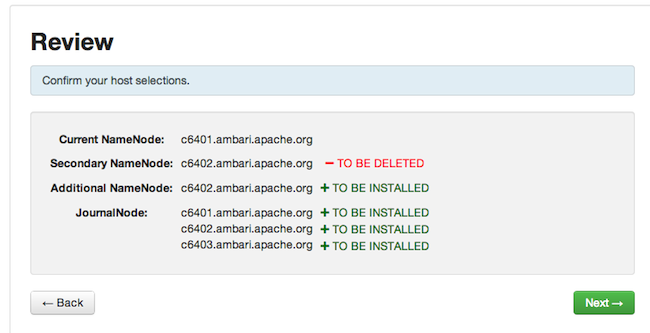
Review: Confirm your host selections and click Next.
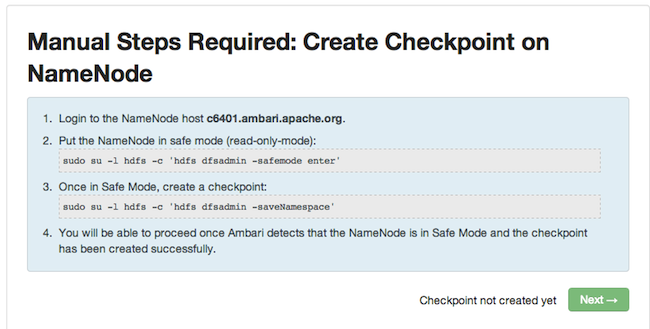
Create Checkpoints: Follow the instructions in the step. You need to login to your current NameNode host to run the commands to put your NameNode into safe mode and create a checkpoint. When Ambari detects success, the message on the bottom of the window changes. Click Next.
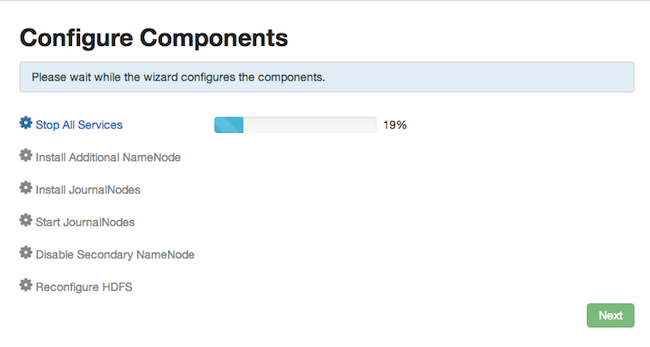
Configure Components: The wizard configures your components, displaying progress bars to let you track the steps. Click Next to continue.
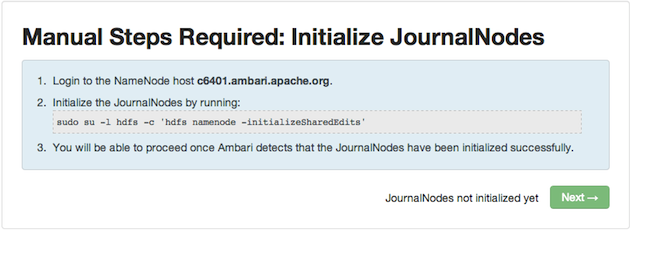
Initialize JournalNodes: Follow the instructions in the step. You need to login to your current NameNode host to run the command to initialize the JournalNodes. When Ambari detects success, the message on the bottom of the window changes. Click Next.
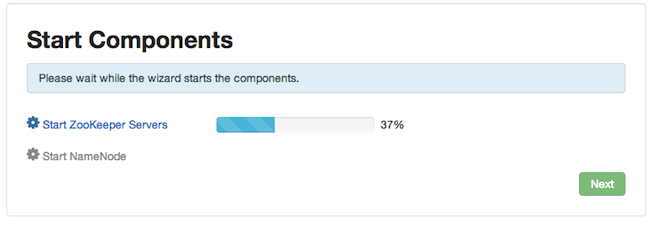
Start Components: The wizard starts the ZooKeeper servers and the NameNode, displaying progress bars to let you track the steps. Click Next to continue.
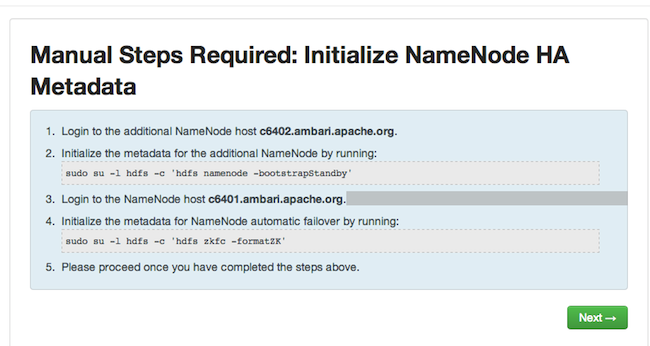
Initialize Metadata: Follow the instructions in the step. For this step you must login to both the current NameNode and the additional NameNode. Make sure you are logged into the correct host for each command. Click Next when you have completed the two commands. A Confirmation popup appears to remind you that you must do both steps. Click OK to confirm.
Finalize HA Setup: The wizard the setup, displaying progress bars to let you track the steps. Click Done to finish the wizard. After the Ambari Web GUI reloads, you may see some alert notifications. Wait a few minutes until the services come back up. If necessary, restart any components using Ambari Web.

If you are using Hive, you need to manually change the Hive Metastore FS root to point to the Nameservice URI instead of the NameNode URI. You created the Nameservice ID in the Get Started step.
Check the current FS root. On the Hive host:
/usr/lib/hive/bin/metatool -listFSRoot
The output might look like this:
Listing FS Roots..
hdfs://<namenode-host>:8020/apps/hive/warehouse
Use this command to change the FS root:
$ /usr/lib/hive/bin/metatool -updateLocation <new-location> <old-location>

For example, where the Nameservice ID is mycluster:
 $ /usr/lib/hive/bin/metatool -updateLocation hdfs://mycluster:8020/apps/hive/warehouse hdfs://c6401.ambari.apache.org:8020/apps/hive/warehouse
The output might look like this:
Successfully updated the following locations..
Updated X records in SDS table
If you are using Oozie, you need to use the Nameservice URI instead of the NameNode URI in your workflow files. For example, where the Nameservice ID is
mycluster:<workflow-app xmlns="uri:oozie:workflow:0.2" name="map-reduce-wf"> <start to="mr-node"/> <action name="mr-node"> <map-reduce> <job-tracker>${jobTracker}</job-tracker> <name-node>hdfs://mycluster</name-node>
