
This section provides you instructions on the following:
This section provides a high-level description of setting up and using Talend Open Studio.
Download the Talend Open Studio add-on for HDP from here.
After the download is complete, unzip the contents in an install location.
Invoke the executable file corresponding to your operating system.
Read and accept the end user license agreement.
Provide a project name (for example, HDPIntro) and click the “Create” button.
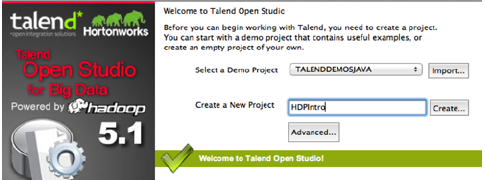
Click “Finish” on the “New Project” dialog
Select the newly created project and click “Open”.
The “Connect To TalendForge” dialog appears, you can choose to register or click “Skip” to continue.
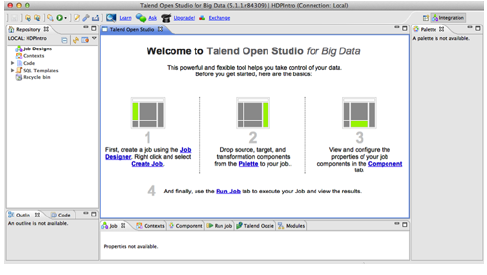
You should now see the progress information bar and a welcome window. Wait for the application to initialize and then click “Start now!” to continue. Talend Open Studio (TOS) main window appears and is now ready for use.
This section provides instructions on designing a simple job of importing a file into the Hadoop cluster.
In the Repository tree view, right-click the “Job Designs” node.
From the contextual menu, select “Create job”.
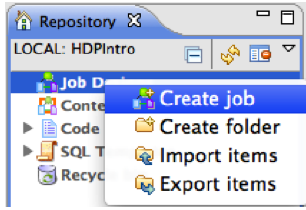
In the “New Job” wizard provide a name (for example HDPJob) and click “Finish”.
An empty design workspace corresponding to the Job name opens up.
Under the
/tmpdirectory of your TOS master deployment machine, create a text file (for example:input.txt) with the following contents:101;Adam;Wiley;Sales 102;Brian;Chester;Service 103;Julian;Cross;Sales 104;Dylan;Moore;Marketing 105;Chris;Murphy;Service 106;Brian;Collingwood;Service 107;Michael;Muster;Marketing 108;Miley;Rhodes;Sales 109;Chris;Coughlan;Sales 110;Aaron;King;Marketing
Jobs are composed of components that are available in the Palette.
Expand the “Big Data” tab in the Palette.
Click on the component
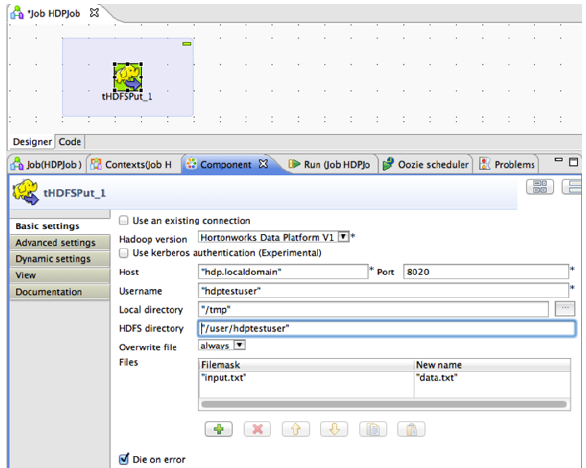
tHDFSPutand click on the design workspace to drop this component.Double-click
tHDFSPutto define component in its Basic Settings view.Set the values in the Basic Settings corresponding to your HDP cluster (see the screenshot given below):
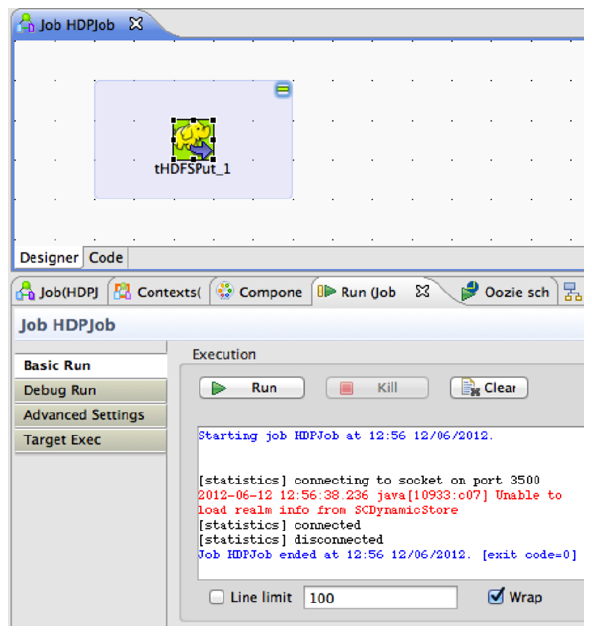
You now have a working job. You can run it by clicking the green play icon.
You should see the following:
From the gateway machine or the HDFS client, open a console window and execute the following command:
[hdptestuser@hdp ~]$ hadoop dfs -ls /user/hdptestuser/data.txt
You should see the following result on your terminal window:
Found 1 items
-rw-r--r-- 3 hdptestuser hdptestuser
252 2012-06-12 12:52 /user/
hdptestuser/data.txt
This message indicates that the local file was successfully created in your Hadoop cluster.
This section provides instructions on using Apache Pig to aggregate the data.
Expand the “Pig” tab in the Big Data Palette.
Click on the component
tPigLoadand place it in the design workspace.
Double-click
tPigLoadcomponent to define its Basic Settings.Click the “Edit Schema” button (“
…” button). Define the schema of the input data as shown below and click OK:
Provide the values for the mode, configuration, NameNode URI, JobTracker host, load function, and input file URI fields as shown.
![[Important]](../common/images/admon/important.png)
Important Ensure that the NameNode URI and the JobTracker host corresponds to accurate values available in your HDP cluster. The Input File URI corresponds to the path where we imported the
input.txtfile in previous section.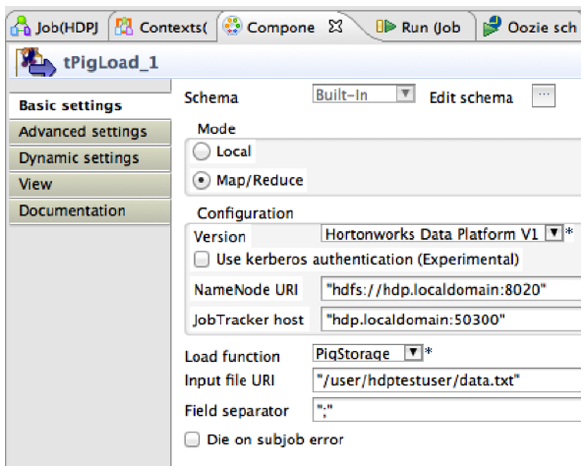
Connect the Pig and HDFS components to define the workflow. To connect the two components:
Right-click the source component (
tHDFSPut) on your design workspace.From the contextual menu, select Trigger -> On Subjob Ok.
Click the target component (
tPigLoad).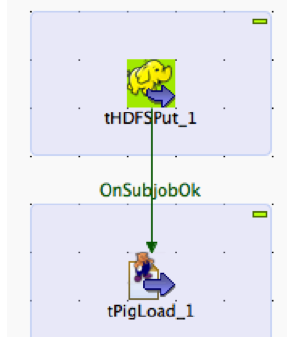
Add the component
tPigAggregatenext totPigLoad.From the contextual menu, right-click on
tPigLoadand select Row -> Pig Combine.Click on
tPigAggregate.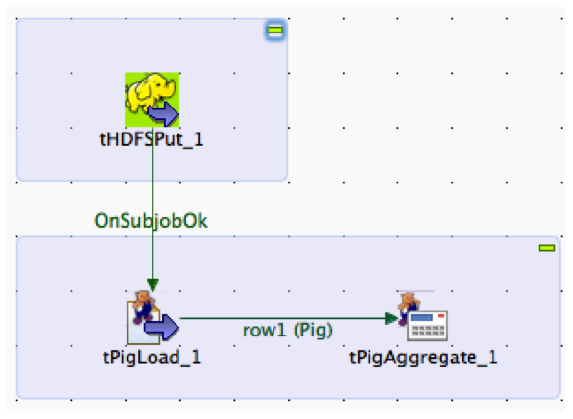
Double-click
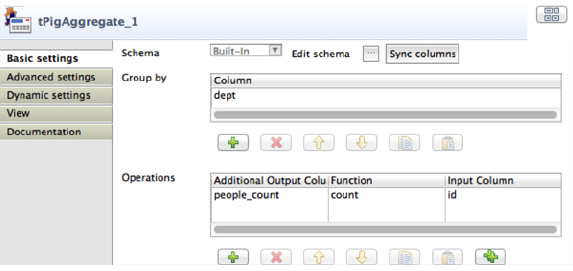
tPigAggregateto define the component in its Basic Settings.Click on the “Edit schema” button and define the output schema as shown below:
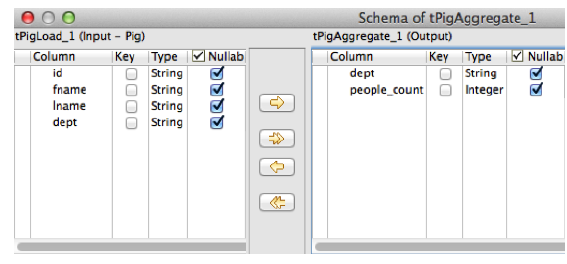
Add a column to “Group by”, choose “dept”.
In the Operations table, choose the “people_count” in the Additional Output column, function as “count” and input column “id” as shown:
Add the component
tPigStoreResultnext totPigAggregate.From the contextual menu, right-click on
tPigLoad, select Row -> Pig Combine and click ontPigStoreResult.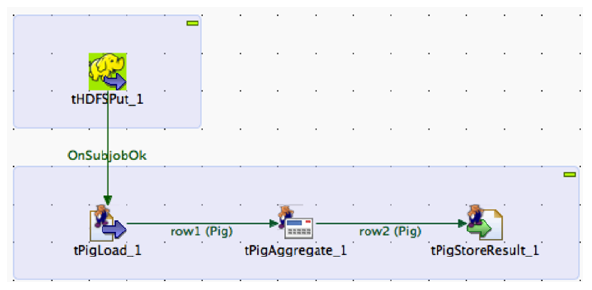
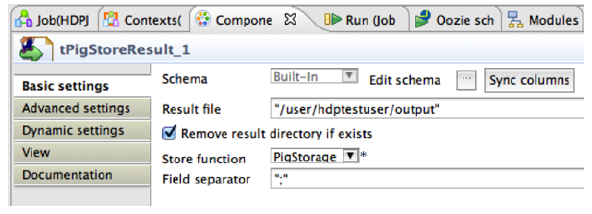
Double-click
tPigStoreResultto define the component in its Basic Settings view.Specify the result directory on HDFS as shown:
The modified Talend job is ready for execution. Save the job and click the play icon to run as instructed in Step 4 of previous section.
